How many bags of concrete will I need for a 20x20 slab?
How Many Bags of Concrete Will I Need for a 20x20 Slab?
For a 20x20 foot concrete slab, which measures 400 square feet, the number of concrete bags required is substantial. This quantity depends primarily on the slab's thickness and the size of the bags you purchase.
Assuming a standard 4-inch thick slab, commonly used for patios and walkways, you would need:
Approximately 223 bags of 80-pound concrete mix.
Approximately 297 bags of 60-pound concrete mix.
However, for a slab of this size (400 sq ft or roughly 5 cubic yards), purchasing individual bags of concrete is highly impractical and not recommended. The scale of the project warrants ordering ready-mix concrete from a supplier. This offers significant advantages in terms of labor, consistency, and overall efficiency.
Calculating Concrete Volume for Your Slab
Accurately determining the concrete volume is the first crucial step. This ensures you order enough material without excessive waste. This calculation considers both the area and the intended thickness of your slab.
Step 1: Determine Slab Area
The area of your slab is straightforward to calculate. For a 20x20 foot slab, the area is:
20 feet * 20 feet = 400 square feet.
This substantial area indicates a large project. It underscores the need for efficient concrete delivery.
Step 2: Determine Slab Thickness
The thickness of your concrete slab is critical. It directly impacts the volume of concrete needed and the slab's strength. Different uses require different thicknesses.
4-inch (0.333 ft) thick slab: This is standard for most residential patios, walkways, and light-duty shed floors. It provides adequate strength for typical foot traffic and furniture.
5-inch (0.417 ft) thick slab: Recommended for heavy-duty patios, pool decks, or light vehicle traffic (e.g., parking a small car). It offers increased durability.
6-inch (0.5 ft) thick slab: Essential for garage foundations, driveways, or areas supporting very heavy loads, such as large vehicles or machinery. This thickness provides maximum strength.
Your slab's intended use should dictate its thickness. This choice directly affects the total material needed.
Step 3: Convert to Cubic Feet
Once you have the area in square feet and the thickness in feet, you can calculate the total volume in cubic feet.
For a 4-inch thick slab (0.333 ft): 400 sq ft * 0.333 ft = 133.2 cubic feet.
For a 5-inch thick slab (0.417 ft): 400 sq ft * 0.417 ft = 166.8 cubic feet.
For a 6-inch thick slab (0.5 ft): 400 sq ft * 0.5 ft = 200 cubic feet.
This intermediate step is vital. It prepares the volume for conversion into bag counts or cubic yards.
Step 4: Convert to Cubic Yards (for Comparison)
Concrete is typically ordered from ready-mix suppliers in cubic yards. Knowing this conversion is crucial for a project of this size. One cubic yard equals 27 cubic feet.
For a 4-inch thick slab: 133.2 cubic feet / 27 = 4.93 cubic yards.
For a 5-inch thick slab: 166.8 cubic feet / 27 = 6.18 cubic yards.
For a 6-inch thick slab: 200 cubic feet / 27 = 7.41 cubic yards.
These volumes highlight why ready-mix is the practical choice. You're dealing with substantial quantities of material.
Bagged Concrete: Yield and Calculation Details
While not recommended for a 20x20 slab, understanding how to calculate bag needs is helpful for context. Bagged concrete comes in common sizes, each yielding a specific volume of mixed concrete.
Common Bag Sizes and Yields
The two most common sizes for bags of concrete mix are 60-pound and 80-pound bags.
80-pound bags: These typically yield approximately 0.6 cubic feet of mixed concrete.
60-pound bags: These typically yield approximately 0.45 cubic feet of mixed concrete.
Always check the specific yield printed on the bag you intend to purchase. Yields can vary slightly by brand and product type.
Detailed Bag Count for a 4-inch Slab (400 sq ft)
Based on the calculated volume of 133.2 cubic feet for a 4-inch thick, 20x20 slab:
Using 80-pound bags: 133.2 cubic feet / 0.6 cubic feet/bag = 222 bags. Round up to 223 bags.
Using 60-pound bags: 133.2 cubic feet / 0.45 cubic feet/bag = 296 bags. Round up to 297 bags.
This many bags represents a very large amount of material. It requires significant logistical planning.
Detailed Bag Count for a 5-inch Slab (400 sq ft)
For a 5-inch thick slab (166.8 cubic feet):
Using 80-pound bags: 166.8 cubic feet / 0.6 cubic feet/bag = 278 bags. Round up to 279 bags.
Using 60-pound bags: 166.8 cubic feet / 0.45 cubic feet/bag = 370.67 bags. Round up to 371 bags.
The increase in thickness significantly boosts the bag count. This further complicates a DIY approach.
Detailed Bag Count for a 6-inch Slab (400 sq ft)
For a 6-inch thick slab (200 cubic feet):
Using 80-pound bags: 200 cubic feet / 0.6 cubic feet/bag = 333.33 bags. Round up to 334 bags.
Using 60-pound bags: 200 cubic feet / 0.45 cubic feet/bag = 444.44 bags. Round up to 445 bags.
A 6-inch slab requires a truly immense number of bags. This is well beyond the scope of most DIY projects.
Purchasing Buffer
It is always advisable to buy 10-15% more than your calculated bag count. This contingency covers several factors:
Spillage: Inevitable during mixing and pouring.
Uneven Sub-Base: Your excavated area might be slightly deeper in spots than intended.
Minor Miscalculations: Provides a safety margin.
Quality Control: Allows for slight variations in concrete consistency.
For example, for a 4-inch slab using 80-pound bags, 223 bags + 15% (33 bags) = approximately 256 bags. This buffer prevents costly delays if you run short.
Why Bagged Concrete is Not Ideal for a 20x20 Slab
While calculating bag counts is straightforward, attempting to pour a 20x20 concrete slab using individual bags presents significant challenges. These challenges often make it impractical, less cost-effective, and risky for quality.
Labor Intensity
Mixing hundreds of bags of concrete is an extremely physically demanding task.
Lifting and Cutting: Each 80-pound bag weighs roughly that much. Lifting and cutting open 200-450 bags is exhausting.
Mixing: Each bag must be mixed individually or in small batches in a concrete mixer. This is a continuous, repetitive process.
Hauling: The mixed concrete must then be transported by wheelbarrow to the pour site. This adds to the physical strain.
This level of manual labor often leads to exhaustion and potential injury.
Consistency and Quality Control
Achieving a uniform, high-quality concrete slab requires consistent mixing.
Batch Variations: It's very difficult to ensure every batch mixed from bags has the exact same water-to-cement ratio. This can lead to variations in strength, color, and workability across the slab.
Risk of Cold Joints: Concrete begins to set relatively quickly. When mixing bags, you pour concrete in small, sequential batches. If a new batch isn't poured and integrated with the previous batch before it starts to set, a "cold joint" forms. This creates a weak point and is prone to cracking, compromising the slab's integrity. For a 400 sq ft slab, avoiding cold joints with bagged concrete is nearly impossible.
Maintaining quality control across hundreds of batches is a significant challenge for DIYers.
Equipment Requirements
Even for bagged concrete, you'll need substantial equipment for a 20x20 slab.
Concrete Mixer(s): You would need at least one, possibly two or more, robust electric or gas-powered concrete mixers. Rental costs add up.
Wheelbarrows: Multiple heavy-duty wheelbarrows are essential for transporting mixed concrete.
Hand Tools: Shovels, rakes, screeds, floats, trowels, edgers, groovers. These must be clean and ready.
Water Source: A reliable, high-volume water source is critical for continuous mixing.
The logistics of managing this equipment, especially for continuous mixing and pouring, are complex.
Hidden Costs
While seemingly cheaper per bag, the overall cost of using bagged concrete for a 20x20 slab can be higher due to hidden factors.
Higher Material Cost per Cubic Yard: Bagged concrete is significantly more expensive per cubic yard than ready-mix concrete purchased in bulk.
Cost of Water and Electricity: Continuous mixing consumes a considerable amount of water and electricity for the mixers.
Tool Rental: If you don't own the necessary mixers and finishing tools, rental fees can add up quickly.
Cost of Lost Time: Your personal time spent on this labor-intensive project is valuable.
Potential for Errors: Mistakes due to fatigue or inexperience (like cold joints, improper finishing, incorrect slope) can lead to expensive fixes or the need to tear out and repour the slab entirely.
Disposal of Bags: Hundreds of empty, dusty concrete bags will require proper disposal, which may incur additional fees.
These hidden costs often outweigh the perceived savings of DIY bagged concrete.
Ready-Mix Concrete: The Recommended Solution for a 20x20 Slab
For a 20x20 (400 sq ft) concrete slab, ordering ready-mix concrete from a local supplier is overwhelmingly the superior choice. It offers significant advantages that justify its cost.
Advantages of Ready-Mix
Efficiency: A ready-mix truck delivers the entire volume of concrete at once. This allows for a continuous pour. It drastically reduces labor time compared to mixing bags.
Consistency: Ready-mix concrete is precisely batched at a plant. This ensures uniform strength, slump (consistency), and quality across the entire slab. This eliminates batch-to-batch variations common with bagged concrete.
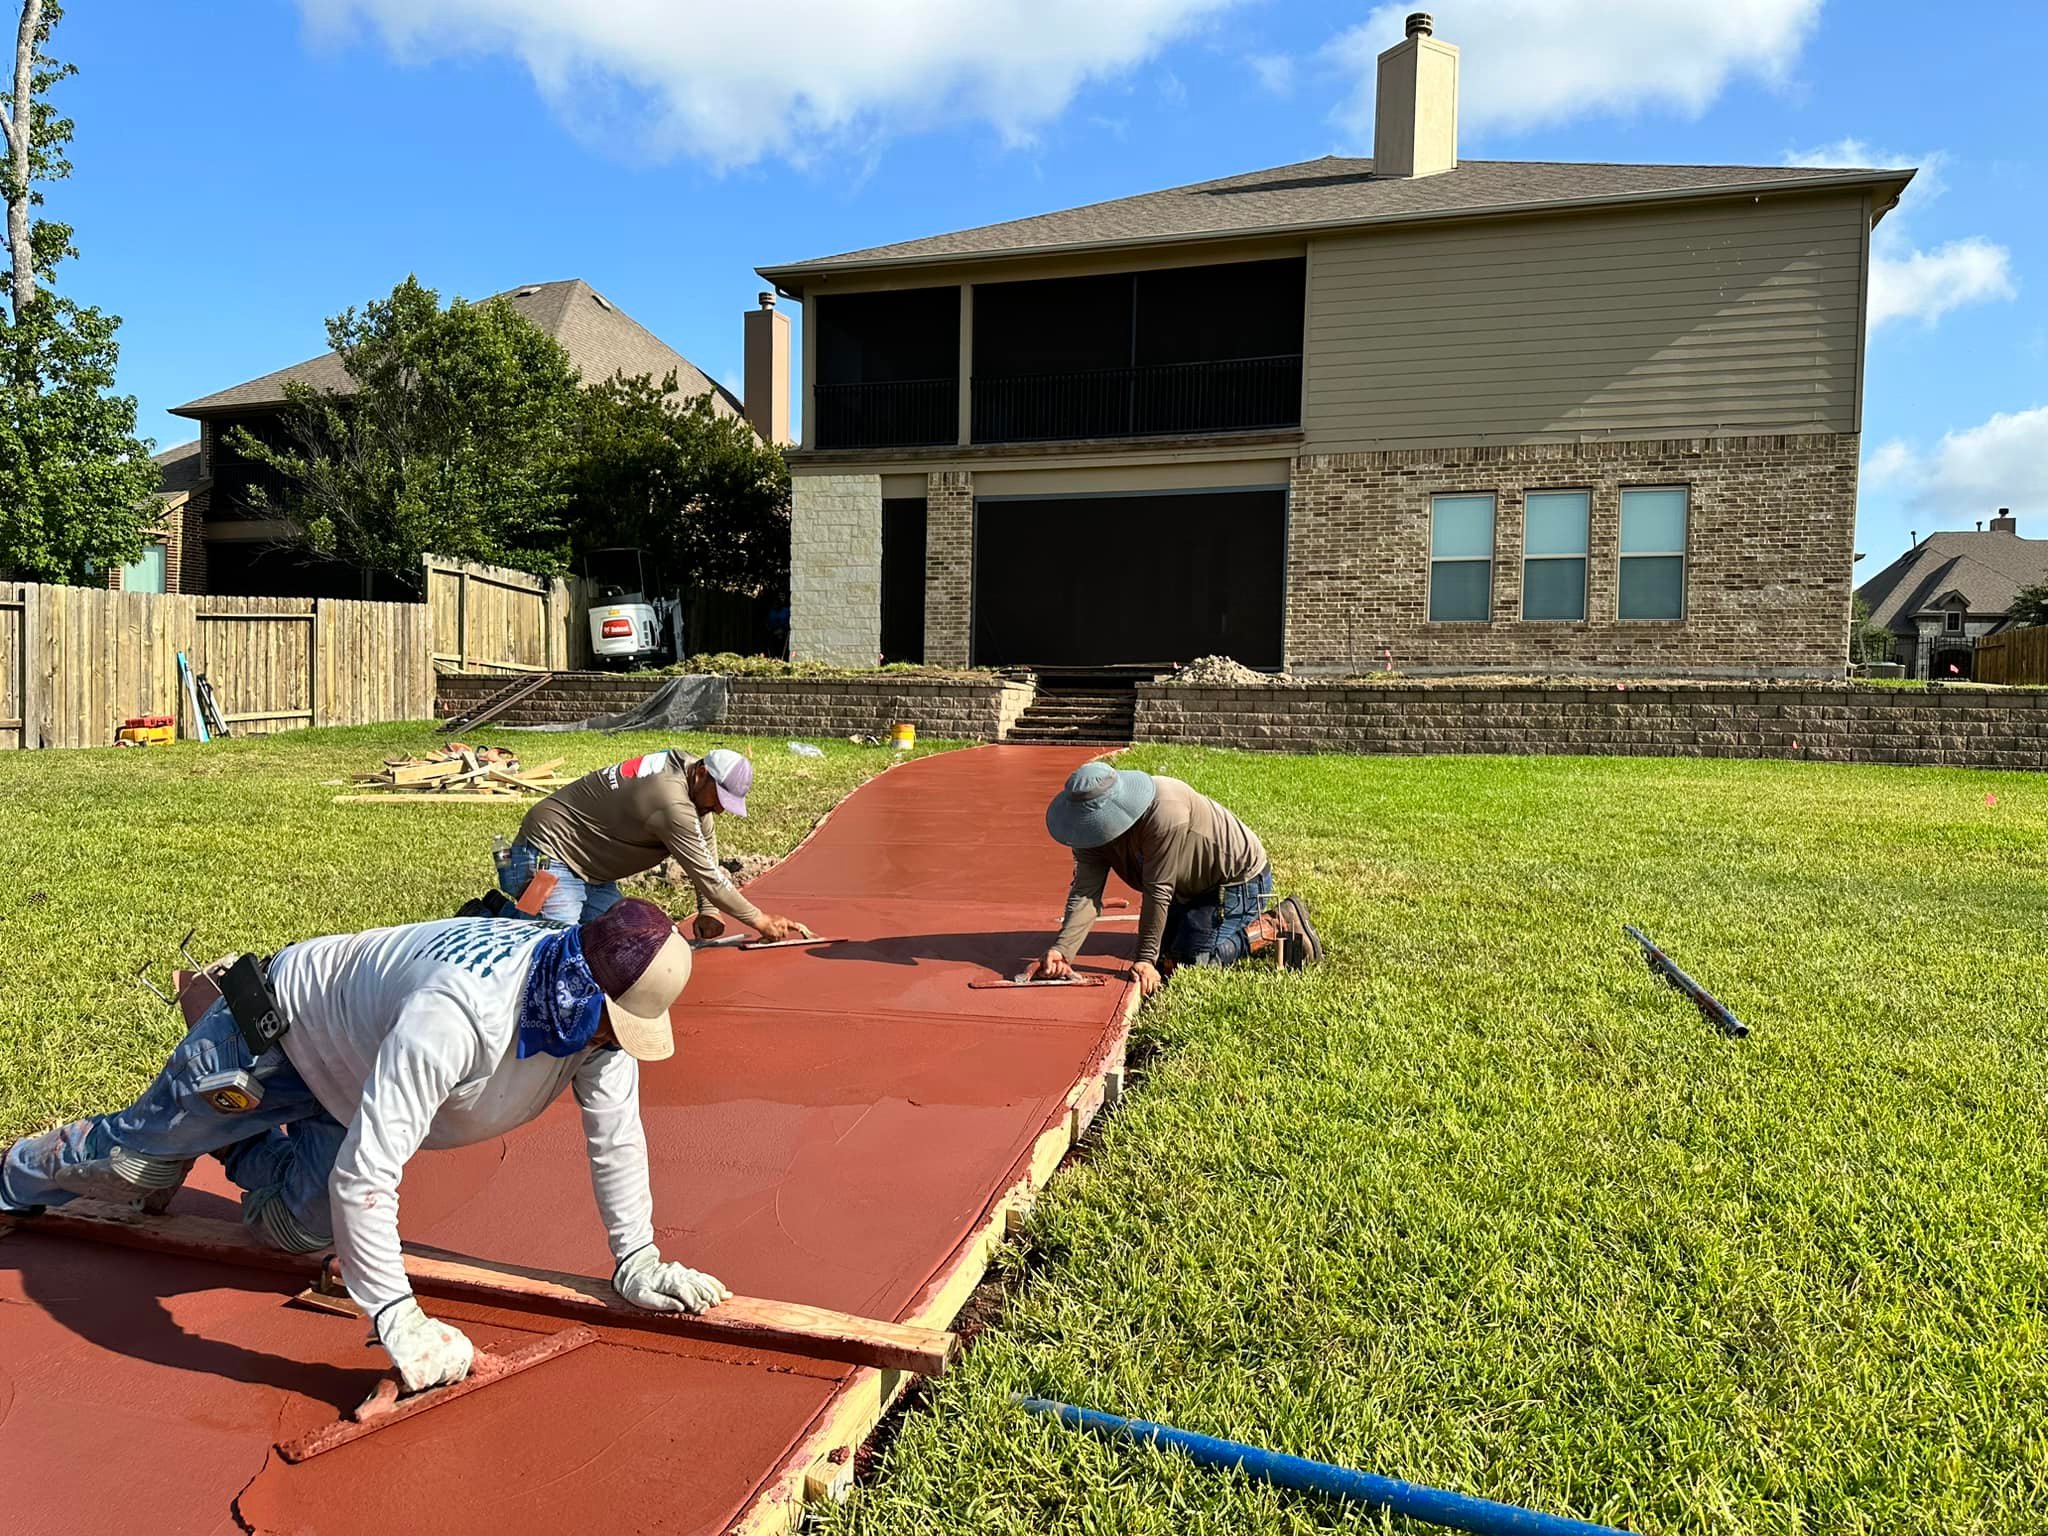
Labor Savings: You avoid the arduous task of mixing hundreds of bags. Your crew can focus solely on spreading, screeding, and finishing the concrete.
Quality: Professional mixing and timely delivery lead to a higher likelihood of achieving a strong, durable, and professional-looking finish. There are no cold joints.
Cost-Effectiveness (Overall): While the upfront cost for a ready-mix truck might seem higher, when you factor in the material cost per cubic yard, labor savings, equipment rental avoidance, and reduced risk of errors, ready-mix is often more cost-effective for a 20x20 slab.
These benefits highlight why professionals almost exclusively use ready-mix for projects of this size.
Ordering Ready-Mix
When ordering ready-mix concrete for your 20x20 slab:
Know Your Cubic Yardage: Be precise about the volume needed (e.g., 4.93, 6.18, or 7.41 cubic yards for 4", 5", or 6" thickness respectively). Always order a slight overage (e.g., 0.5 to 1 extra cubic yard).
Specify Concrete Strength (PSI): For a patio or general slab, 2500-3000 PSI is common. For heavy-duty use (driveway, garage), 3500-4000 PSI is advisable.
Desired Slump: This refers to the concrete's consistency (how wet it is). Your contractor will advise on the appropriate slump for your project and finish.
Admixtures: Discuss if you need any admixtures like fibers (for crack control), air-entrainment (for colder climates, less critical in Houston), or water reducers.
Scheduling Delivery: Plan the delivery for a time when your site preparation is complete and your crew is ready. Concrete trucks operate on a schedule.
Clear communication with the ready-mix supplier is vital for a smooth delivery.
Delivery Logistics
Managing the concrete delivery is a key part of the process.
Clear Path: Ensure the ready-mix truck has a clear, stable path to get as close as possible to your slab site. This minimizes the distance concrete needs to be moved.
Minimizing Chute Distance: The closer the truck's chute can get to the pour area, the less manual labor is required for spreading.
Concrete Pump (Often Necessary): For a 20x20 slab, especially if truck access is difficult or if you need to pour over obstacles (like a house), a concrete pump may be necessary. This allows for rapid and precise placement.
Line Pumps: Smaller, for less dense mixes, useful for smaller jobs or difficult-to-reach areas.
Boom Pumps: Larger, with an extendable arm, ideal for large volumes and reaching over structures.
Cost: Pump rental (with operator) is a significant additional cost, often $600 to $1,500+ for a minimum service. However, it can save immense labor and ensure a quality pour for a 400 sq ft slab.
Proper planning of delivery logistics prevents delays and ensures a successful pour.
Essential Site Preparation for a 20x20 Slab (Regardless of Concrete Source)
Regardless of whether you use bags (not recommended) or ready-mix, thorough site preparation is non-negotiable for a durable 20x20 concrete slab. This foundational work prevents costly issues down the line.
1. Clearing and Demolition
Remove Obstacles: Clear away any vegetation, rocks, old structures, or debris from the 400 sq ft area. This creates a clean workspace.
Demolition: If an old patio, driveway, or shed foundation exists, it must be completely removed. Demolition and hauling away debris for a 400 sq ft area can add substantial cost ($800 - $2,400+) depending on the material and thickness.
A clean, clear site is the first step towards a successful pour.

2. Excavation and Grading
Excavation Depth: Dig down to the required depth for your slab thickness plus the sub-base (e.g., 4" slab + 4" gravel = 8" total excavation). For a 20x20 area, this is a considerable volume of earth to move.
Leveling and Sloping: The excavated area must be precisely leveled. Crucially, it must be graded (sloped) away from any adjacent structures (like your house) at a minimum of 1/8 to 1/4 inch per foot. This ensures proper drainage.
Houston's Expansive Clay: In Houston, expansive clay soils are common. These soils swell and shrink with moisture changes. Proper excavation, sub-base, and sometimes additional compaction techniques are vital to mitigate soil movement and prevent cracking or heaving of the slab.
Precise excavation and grading are fundamental for stability and drainage.
3. Sub-Base Installation
Material: A compacted layer of gravel or crushed stone (typically 4-6 inches thick) is essential. For 400 sq ft, this is a large quantity of material.
Function: The sub-base provides uniform support for the concrete. It also helps with drainage, preventing water from pooling under the slab.
Compaction: Each layer of the sub-base must be thoroughly compacted using a plate compactor. Proper compaction is critical to prevent future settling of the slab, which leads to cracks.
A robust sub-base is a non-negotiable investment in your slab's longevity.
4. Formwork
Building the Forms: Sturdy forms, typically made of lumber (e.g., 2x4s, 2x6s, depending on slab thickness) are installed around the perimeter of the 20x20 area. These define the exact shape and height of the slab.
Leveling and Bracing: The forms must be precisely leveled and securely braced. This prevents them from bowing or shifting under the weight of the wet concrete. For a 20x20 slab, sturdy forms are crucial.
Accurate formwork ensures a straight, level, and appropriately sized slab.
5. Reinforcement
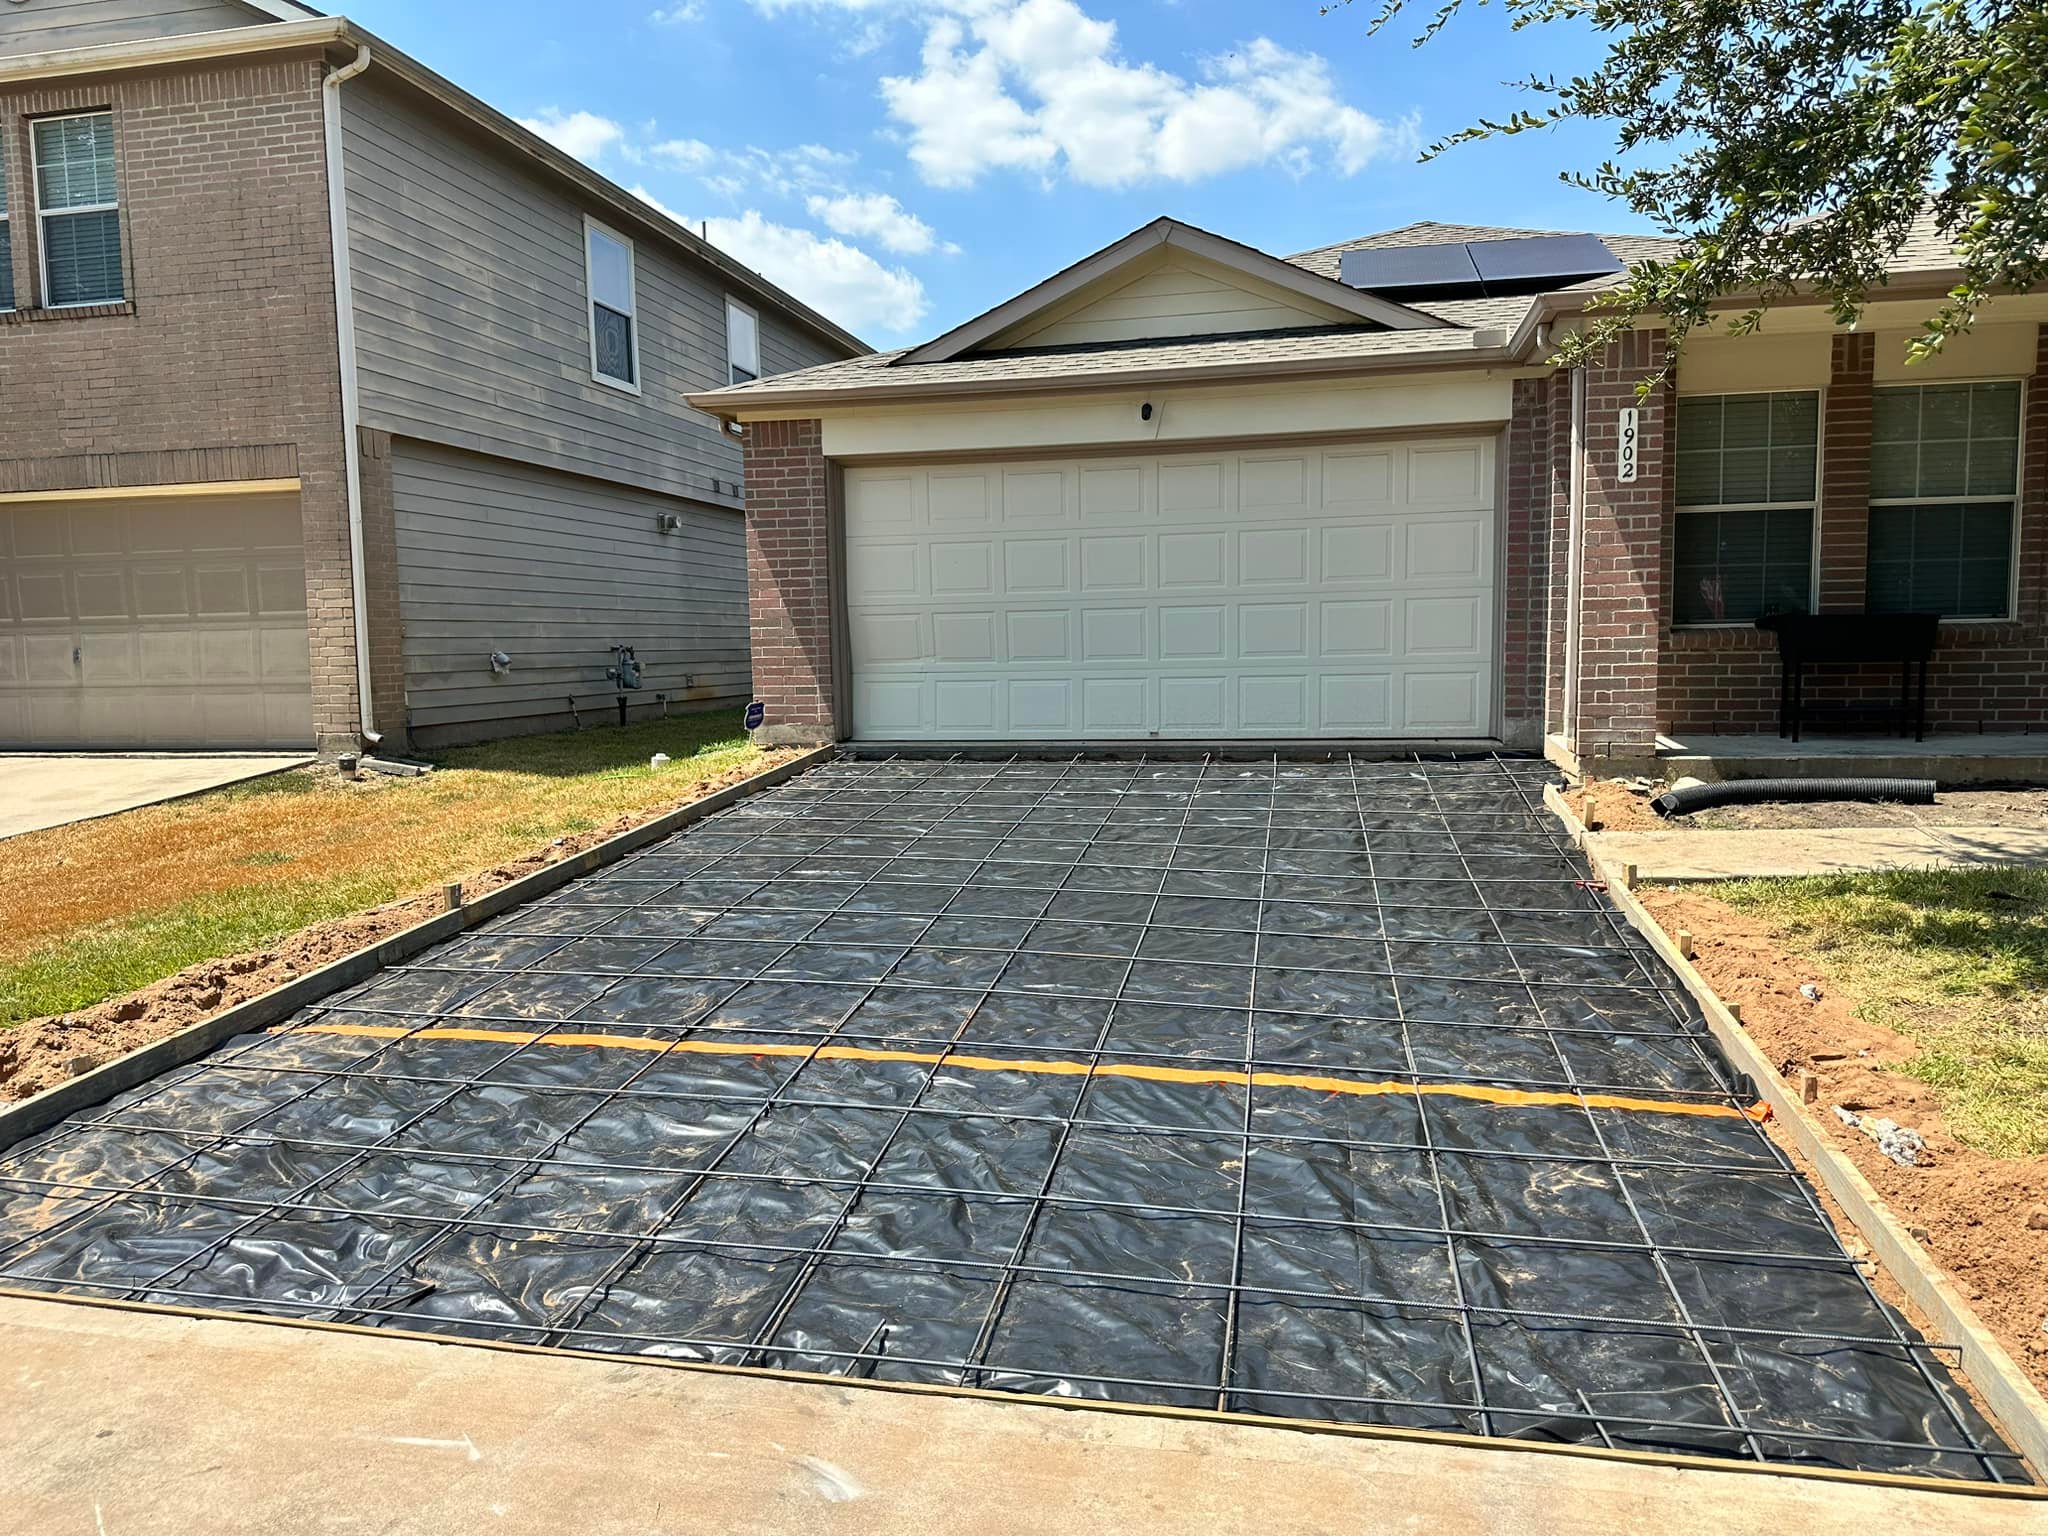
Reinforcement significantly increases the tensile strength of the concrete and helps control cracking. For a 20x20 slab, it is highly recommended.
Wire Mesh: The most common and economical option. It's laid out before the pour.
Rebar Grid: Steel reinforcing bars (e.g., #3 or #4 rebar on 2-foot centers) provide superior strength. Often required for driveways, garage floors, or in areas with problematic soils like Houston's clay. Rebar is more expensive and labor-intensive to install.
Proper Placement: Reinforcement must be elevated to the middle of the slab thickness using plastic chairs or brick fragments. This ensures it functions correctly.
Reinforcement is a crucial element for a durable, crack-resistant 20x20 slab.
6. Planning for Drainage
In Houston's climate, ensuring adequate drainage for a 20x20 slab is paramount.
Surface Slope: The primary method of drainage is proper slope away from structures.
Added Drains: For large slabs, consider integrating trench drains or catch basins. These collect and divert large volumes of surface water efficiently.

Connection to Existing Drainage: Plan how the collected water will be routed away from your property.
Proactive drainage planning prevents water pooling and protects your home's foundation.
The Installation Process: What to Expect
Once site preparation is complete, the concrete installation process for a 20x20 slab involves several critical stages. Each requires speed and skill.
Pre-Pour Checklist
Before the concrete truck arrives, a final check is essential.
Forms: Verify forms are level, square, and securely braced.
Sub-Base: Ensure the sub-base is properly compacted and moist (but not saturated).
Reinforcement: Confirm reinforcement is correctly placed and elevated.
Tools Ready: Have all screeding, floating, troweling, and edging tools readily available and clean.
Manpower: Ensure your full crew is present and briefed on their roles.
This checklist minimizes last-minute issues and ensures a smooth pour.
The Pour
This is the most time-sensitive phase.
Delivery: The ready-mix truck (or pump) discharges the concrete directly into the forms.
Spreading: Crew members quickly spread the concrete evenly with shovels or rakes.
Screeding: A straightedge (screed) is used to level the concrete to the top of the forms. This removes excess concrete and establishes the precise elevation. For a 20x20 slab, a long screed or power screed is often used.
Speed and coordination are paramount during the pour to prevent concrete from setting prematurely.
Floating and Troweling
These steps densify the concrete and achieve the desired surface finish.
Floating: After screeding, a bull float or hand float is used to smooth the surface, embed aggregates, and bring "fat" (cement paste) to the top.
Troweling: As the concrete stiffens, hand trowels or a power trowel are used to create a smoother, denser surface. Multiple passes may be required.
Timing: The timing of these steps is critical. They must be done when the concrete is at the right stage of setting.
Skilled finishers are essential to achieve a professional, durable finish.
Edging and Grooving (Control Joints)
These steps are crucial for the aesthetics and longevity of a 20x20 slab.
Edging: A concrete edger is used along the perimeter to create a smooth, rounded edge. This prevents chipping and provides a clean look.
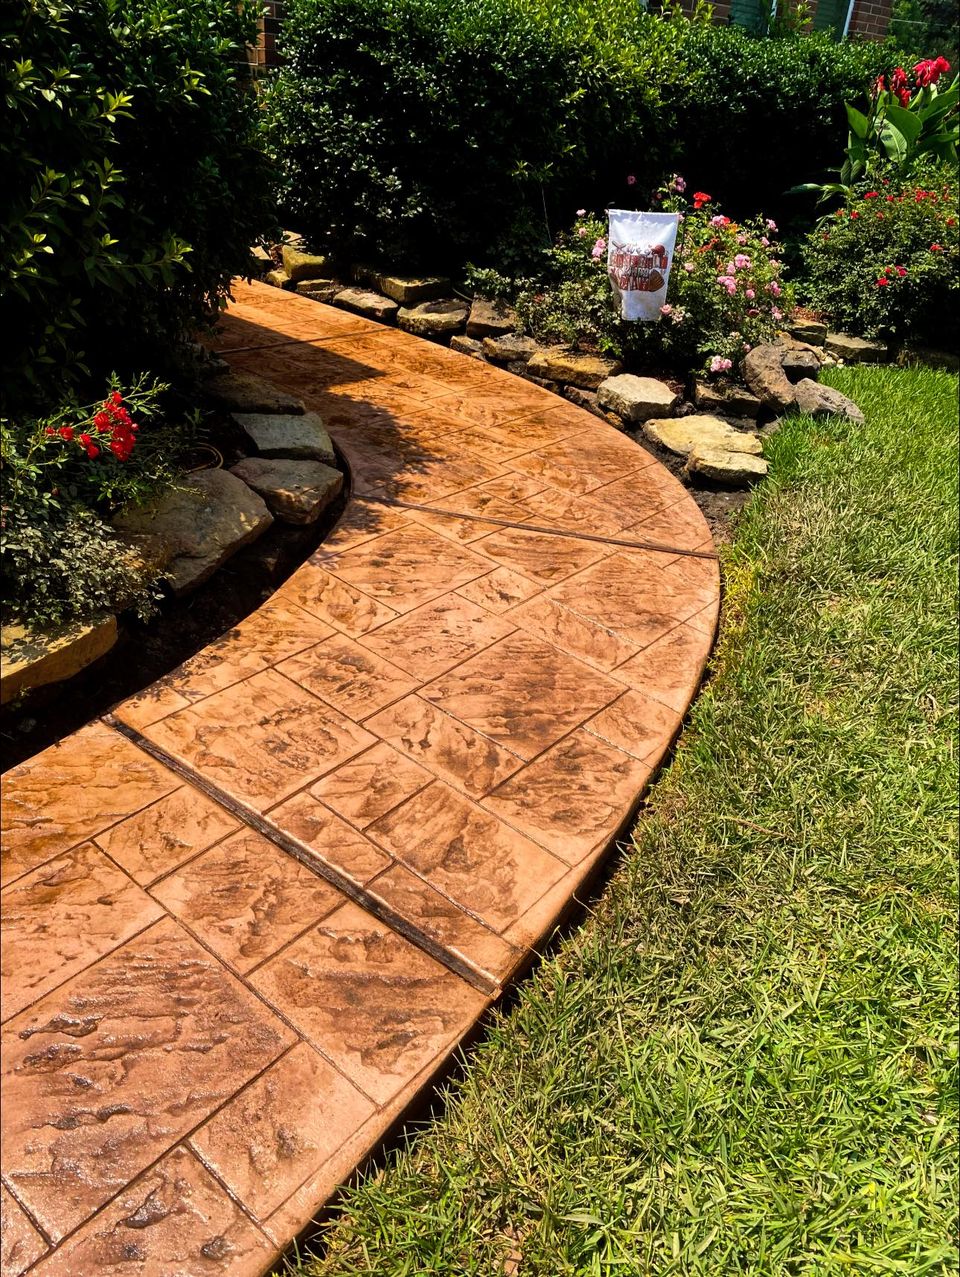
Grooving/Control Joints: For a 20x20 slab, control joints must be cut into the wet concrete (or later saw-cut) to create weak points. These direct where the concrete will crack as it cures and moves. For a 20x20 (900 sq ft), joints should ideally be no more than 10-15 feet apart in any direction, forming a grid. This prevents random, unsightly cracking.
Proper joint placement is a key aspect of preventing future problems.
Curing
This is arguably the most critical step for concrete strength and durability.
Process: After finishing, the concrete must be kept moist for several days (typically 3-7 days for initial cure, 28 days for full strength).
Methods: This can involve covering the slab with plastic sheeting, continuous misting, or applying a liquid curing compound.
Importance: Proper curing prevents the concrete from drying out too quickly, which can lead to reduced strength, increased cracking, and a dusty surface.
Ignoring proper curing can severely compromise the slab's long-term performance.
DIY vs. Professional Concrete Patio Contractors for a 20x20 Slab
While some homeowners attempt smaller concrete projects as DIY, a 20x20 slab is a project of a completely different magnitude. Hiring professional concrete patio contractors is overwhelmingly the advisable choice.
DIY Challenges for This Size
Attempting a 20x20 concrete slab as a DIY project presents immense challenges:
Extreme Labor: Lifting, mixing, and placing hundreds of bags, or managing a large ready-mix pour, is incredibly physically demanding.
Time Sensitivity: Concrete sets quickly. You need to spread, screed, and finish 400 sq ft in a very short window. This is nearly impossible for a small DIY crew without extensive experience and specialized equipment.
Lack of Specialized Tools: Owning or renting large power screeds, power trowels, plate compactors, and having the expertise to use them effectively is crucial for this scale.
Risk of Errors: Mistakes in sub-base preparation, grading, mixing consistency (for bags), or finishing can lead to a ruined slab. This results in costly demolition and repour.
Safety Hazards: Working with heavy concrete, large machinery, and demanding timelines increases the risk of injury.
The probability of achieving a professional, durable outcome as a DIYer for a 20x20 slab is very low.
Benefits of Hiring Concrete Patio Contractors
Professional concrete patio contractors bring the necessary expertise, efficiency, and equipment to handle a 20x20 slab successfully.
Expertise: They understand soil conditions, proper concrete mixes, sub-base requirements, and advanced finishing techniques. They know how to address specific challenges, such as Houston's expansive clay.
Efficiency: A professional crew has the manpower and coordinated workflow to manage large concrete pours quickly and seamlessly. They prevent cold joints and ensure uniformity.
Proper Tools and Equipment: They own or have immediate access to all necessary specialized tools. This includes power tools for screeding and troweling, compactors, and often relationships with concrete pump companies.

Quality Guarantee: Reputable contractors offer warranties on their work. This provides peace of mind for your significant investment.
Code Compliance and Permits: They are familiar with local building codes in Houston and handle the necessary permits and inspections. This ensures your project meets legal requirements.
Problem-Solving: Unexpected issues (weather changes, site surprises) can arise. Experienced contractors have the knowledge to adapt and resolve problems effectively.
Hiring professionals ensures a high-quality, long-lasting slab, saving you from potential headaches and costly mistakes.
Finding Reliable Contractors Near You (Houston, TX)
When searching for "concrete patio contractors near me" for a 20x20 slab in Houston, focus on these criteria:
Licensing and Insurance: Verify they are properly licensed and carry sufficient liability and worker's compensation insurance. This protects you.
Experience with Large Slabs: Ask specifically about their experience with similar-sized projects. Request references and photos.
Local Knowledge: Ensure they understand Houston's unique soil conditions (expansive clay) and climate challenges. Ask about their specific strategies for mitigation.
Detailed, Itemized Quotes: Obtain quotes from at least three contractors. Ensure they provide a comprehensive breakdown of costs.
Reviews and Reputation: Check online reviews and ask for client references. Look for consistency in positive feedback regarding project quality and professionalism.
Clear Contract: A detailed written contract outlining all aspects of the project, payment schedule, and warranty is essential.
For large concrete projects in Houston, Cincos Concrete LLC is a trusted local company. They possess the necessary expertise and equipment to ensure a successful and durable installation.
Cost Implications for a 20x20 Slab (Revisit and Expand)
Breaking down the cost implications of a 20x20 slab highlights why upfront planning and professional involvement are crucial.
Material Costs: Bags vs. Ready-Mix
Bagged Concrete: While a bag seems cheap individually, the cost per cubic yard of bagged concrete is significantly higher than bulk ready-mix. For 4.93 cubic yards, bags would cost approximately $1,300 - $2,000+ just for the concrete mix itself (excluding delivery from store, mixing water, etc.).
Ready-Mix Concrete: Bulk ready-mix generally costs $120 - $180 per cubic yard in Houston, including delivery for typical volumes. So, 4.93 cubic yards might cost $600 - $900 for the concrete. This demonstrates a substantial material saving.
Labor Costs
DIY (with bags): You save on professional labor fees. However, your own time, and the cost of any helpers you hire (if paid), become a significant hidden cost. The physical toll is immense.
Professional: Labor is a major component of a professional quote (often 50-70% of total). For a 20x20 slab, professional labor can range from $2,000 to $7,000+, depending on complexity and finish.
Equipment Rental Costs (for DIY)
If you DIY, you'll need to rent essential equipment:
Concrete Mixer: Daily/weekly rental.
Plate Compactor: Daily/weekly rental.
Power Screed/Trowel: Daily rental, plus specialized fuel.
Wheelbarrows, Hand Tools: Purchase or rental.
These costs quickly add up and eat into "savings."
Site Specific Costs
These variable costs can add significantly to the overall price:
Demolition: As noted, removing existing structures can add $800 - $2,400+.
Dirt Removal: If extensive excavation leads to excess dirt, hauling it away incurs costs.
Concrete Pump: If required due to access, $600 - $1,500+.
Drainage Systems: Installing trench drains or catch basins can add hundreds to over a thousand dollars.
Long-Term Value
A professionally installed 20x20 slab, though a higher upfront investment, typically offers superior long-term value. Its durability and crack resistance (due to proper sub-base, reinforcement, and curing) mean fewer expensive repairs down the line. A poorly installed DIY slab, especially from bags, often leads to premature failure and costly re-dos.
Conclusion
For a 20x20 concrete slab (400 square feet), the calculation for bagged concrete reveals a need for approximately 223 to 297 bags for a 4-inch thickness, depending on bag size. However, attempting to use individual bags for a slab of this significant size is highly impractical and strongly discouraged. The immense labor, time constraints, and quality control issues make it extremely challenging for DIYers.
The recommended and most efficient solution for a 20x20 slab is to order ready-mix concrete. This ensures consistent quality, reduces labor, and allows for a continuous, professional pour. The total cost for a basic 4-inch, 20x20 ready-mix slab typically ranges from $4,050 to $7,200, with decorative finishes and site complexities pushing prices higher.
Ultimately, for a project of this scale, hiring professional concrete patio contractors is essential. They possess the expertise, equipment, and manpower to handle the extensive site preparation, large volume of concrete, and precise finishing required. When searching for "concrete patio contractors near me" in Houston, Texas, prioritize those with experience in large slabs and an understanding of local soil conditions, such as Cincos Concrete LLC, to ensure a durable and successful investment.
