How many bags of concrete do I need for a 10x10 slab?
How Many Bags of Concrete Do I Need for a 10x10 Slab?
Estimating the correct amount of concrete for any project is fundamental. For a 10x10 foot slab, precision is key. This avoids costly over-ordering or frustrating shortages. Knowing the exact bag count ensures a smooth and efficient build.
This calculation is vital for various applications. It applies to shed foundations or small patios. It's also foundational for understanding larger projects. Even for concrete driveway sections, this math is crucial.
This comprehensive guide will break down the process. We will cover calculating the required volume. We will also determine the precise number of concrete bags. Factors influencing this calculation will be explored.
We will also delve into the entire slab construction process. This includes site preparation and pouring techniques. Proper curing and essential safety measures will be discussed. This ensures your project's success.
Core Calculation: Determining Concrete Volume
Accurately calculating the volume of concrete needed is the first step. This prevents waste and ensures you have enough material. The dimensions of your slab are crucial for this process.
Step 1: Calculate Volume in Cubic Feet
A 10x10 foot slab covers 100 square feet of area. The thickness of the slab is equally important. This dimension is usually measured in inches. Most bags of concrete are sold by volume.
To calculate volume, all measurements must be in the same unit. Convert slab thickness from inches to feet. For example, a 4-inch slab is 4/12 feet, or approximately 0.333 feet. This conversion factor is essential.
Multiply the length by the width by the thickness (in feet). For a 10x10 foot slab, 4 inches thick: 10 ft×10 ft×(4/12 ft)=100 sq ft×0.333 ft=33.33 cubic feet. This result gives you the total cubic footage required.
Step 2: Convert Cubic Feet to Cubic Yards
Concrete is typically ordered or measured in cubic yards. One cubic yard contains 27 cubic feet. This conversion is a standard industry practice. It simplifies larger volume orders.
Divide your cubic feet total by 27. For our 33.33 cubic feet example: 33.33 cubic feet/27 cubic feet/cubic yard≈1.23 cubic yards. This gives you the volume in cubic yards.
Most ready-mix concrete suppliers deliver in cubic yard increments. Understanding this conversion is key. It helps you speak the same language as concrete professionals.
Step 3: Account for Waste and Irregularities
It is always wise to add a waste factor to your calculation. Concrete projects rarely use the exact theoretical amount. Spillage, uneven subgrades, and minor errors are common.
A waste factor of 5% to 10% is standard. For our 1.23 cubic yards, adding 10% means: 1.23 cubic yards×1.10=1.353 cubic yards. This accounts for unforeseen circumstances.
Rounding up is always recommended. Ordering slightly more is better than running short. A small amount of leftover concrete is preferable to delays. Shortages cause extra delivery fees and rushed work.
Step 4: Determine Bags Needed (from Cubic Yards)
Concrete bags come in various sizes. Common sizes are 60-pound and 80-pound bags. Each bag size yields a different volume of mixed concrete. This affects your final bag count.
An 80-pound bag typically yields about 0.60 cubic feet of concrete. A 60-pound bag yields about 0.45 cubic feet. Always check the bag's specifications.
To find the number of bags, divide your total cubic feet (including waste) by the yield per bag. For 33.33 cubic feet plus 10% waste (36.66 cubic feet):
Using 80-pound bags: 36.66 cubic feet/0.60 cubic feet/bag≈61.1 bags. Round up to 62 bags.
Using 60-pound bags: 36.66 cubic feet/0.45 cubic feet/bag≈81.4 bags. Round up to 82 bags.
Always round up to the nearest whole bag. It is better to have a few extra bags than to run short. This calculation helps ensure you have enough material for your 10x10 slab.
Influential Factors on Concrete Bag Count
While the basic calculation provides a starting point, several factors can alter the actual number of concrete bags required. These considerations ensure accuracy and prevent project setbacks.
Slab Thickness: A Primary Driver
The thickness of your 10x10 concrete slab is the most significant factor. It directly impacts the volume of concrete needed. Different applications demand varying thicknesses for adequate support.
For light-duty use, like a simple patio or a foundation for a small shed, a 4-inch thick slab is often sufficient. This provides adequate strength for foot traffic and light loads. Our previous example calculated this.
If the slab will support heavier items, such as a garden tractor or a large storage shed, a 5-inch thick slab might be advisable. This extra inch adds considerable strength. The volume of concrete increases substantially. For a 10x10 slab, this would be 100 sq ft×(5/12 ft)≈41.67 cubic feet.
For areas with very heavy loads, such as a parking pad for a vehicle or sections of a concrete driveway, a 6-inch thick slab is highly recommended. This provides superior durability and load-bearing capacity. The volume jumps to 100 sq ft×(6/12 ft)=50 cubic feet. This substantial increase directly correlates to many more concrete bags.
Always select the appropriate thickness based on the slab's intended use. Overestimating thickness leads to unnecessary cost. Underestimating can result in premature failure and costly repairs. Consulting with a professional can help determine the ideal thickness.
Subgrade Conditions and Levelness
The condition and levelness of your subgrade directly impact material usage. An uneven subgrade can significantly increase the amount of concrete needed. Low spots will require more concrete to achieve a uniform thickness.
Proper grading and compaction of the subgrade are crucial. This creates a stable and consistent foundation. A well-prepared subgrade minimizes concrete overconsumption. It also prevents future settling and cracking.
Skipping proper subgrade preparation is a false economy. Any savings on excavation will be lost in additional concrete. It also compromises the long-term durability of your slab. Investing time here saves money later.
Reinforcement Type and Placement
The type and placement of reinforcement also subtly affect concrete volume. While not a major factor like thickness, it can influence total material. Reinforcement provides tensile strength and helps control cracking.
Wire mesh is often used for lighter slabs. It sits within the concrete. Its volume displacement is minimal. This means it has very little effect on the overall concrete needed.
Rebar (reinforcing bar) takes up more space. For a 10x10 slab, the rebar grid might displace a small amount of concrete. However, this is usually negligible for residential projects. Its primary purpose is structural integrity.
The use of rebar chairs or dobies to hold reinforcement in place also displaces a tiny volume. These supports ensure the rebar is correctly positioned within the slab. This ensures its effectiveness.
While not a direct calculation factor for bags, proper reinforcement affects slab performance. It minimizes issues like cracking. This prevents the need for costly concrete repairs later.
Ordering Bags vs. Ready-Mix Concrete
For a 10x10 slab, especially at 4 inches thick (approx. 1.23 cubic yards), you might be on the cusp of needing a ready-mix truck. Many concrete suppliers have minimum delivery charges. These often start around 1-2 cubic yards.
If your project is slightly larger, or if you prefer convenience, ready-mix can be more cost-effective per cubic yard. It eliminates the labor of mixing many bags. It also ensures consistent concrete quality.
For a smaller volume, or if access is difficult, bags might be the only option. Bags allow for a phased approach. They can be mixed on-site as needed. Evaluate the total volume and labor implications before deciding.
Planning Your 10x10 Concrete Slab Project
Proper planning is paramount for a successful concrete slab installation. For a 10x10 slab, even seemingly small details matter. A well-executed plan saves time, money, and prevents errors.
Site Assessment and Preparation
Begin with a thorough assessment of your chosen site. Clear the area of all vegetation, rocks, and debris. Remove any existing structures, such as old paving or shed remnants. The goal is a clear, unobstructed space.
Next, accurately measure out your 10x10 foot area. Use stakes and string to mark the perimeter. This ensures precise dimensions for your slab. Double-check all measurements before proceeding.
Consider the drainage of the area. Concrete slabs should ideally have a slight slope (e.g., 1/8 inch per foot) to allow water runoff. This prevents pooling. Proper drainage protects the slab and surrounding structures.
Excavate the area to the required depth. This depth accounts for both the slab thickness and the sub-base layer. A solid sub-base is crucial for long-term stability.
Local Codes and Permits
Before starting any concrete project, check local building codes and permit requirements. Even for a 10x10 slab, permits might be necessary. Regulations vary significantly by municipality.
Local codes dictate slab thickness, reinforcement, and drainage standards. Adhering to these ensures safety and compliance. It prevents costly fines or the need to tear out and redo work.
Your contractor, if you hire one, should handle permitting. If it's a DIY project, you are responsible. Researching this step early avoids legal complications and project delays.
Tool and Material List
Having all necessary tools and materials on hand before starting is critical. This prevents interruptions during the concrete pour. The list includes items for preparation, pouring, and finishing.
Essential Tools:
Shovels and rakes for excavation and spreading.
Wheelbarrow for mixing and transporting concrete (if using bags).
Level and tape measure for accurate setup.
Wood or metal stakes for setting forms.
Power drill for attaching form boards.
Screed board (a straight 2x4 or metal bar) for leveling wet concrete.
Bull float or hand float for smoothing the surface.
Edger and groover for finished edges and control joints.
Safety glasses, gloves, and boots for personal protection.
Concrete mixer (if using bags).
Materials:
Concrete bags (calculated quantity) or ready-mix order.
Sub-base material (gravel, crushed stone).
Form boards (2x4s or 2x6s, depending on thickness).
Form stakes or rebar to secure forms.
Plastic sheeting (vapor barrier, optional but recommended).
Reinforcement (wire mesh or rebar, and chairs).
Curing compound or plastic sheeting for curing.
Sealer (optional, for post-curing protection).
Having this comprehensive list ensures you're fully prepared. This preparation streamlines the actual concrete work. It minimizes stress during the pour.
The Concrete Slab Installation Process (Step-by-Step)
Installing a concrete slab involves a series of sequential steps. Each stage is crucial for ensuring a durable, level, and long-lasting finished product. Careful execution at each point is essential.
1. Site Preparation and Grading
As discussed, this initial phase sets the foundation. After marking the 10x10 area, excavate to the required depth. This depends on your slab thickness plus the sub-base. Digging should be uniform.
Grade the excavated area to ensure proper drainage. A slight slope, typically 1/8 inch per foot, is ideal. This allows water to run off the slab. It prevents puddling and prolongs the slab's life.
Use a rake to achieve an even grade. Compact the soil thoroughly. A plate compactor is recommended for this size. This prevents future settling of the slab.
2. Install Sub-Base and Compaction
Once the subgrade is prepared, lay down the sub-base material. Typically, this is 4-6 inches of gravel or crushed stone. This layer provides uniform support. It also acts as a drainage layer.
Spread the gravel evenly across the entire 10x10 area. Use a rake to achieve a consistent thickness. Then, compact the gravel thoroughly. A plate compactor is essential for effective compaction.
Compact the sub-base in layers if it's thick. This ensures maximum density. A well-compacted sub-base prevents slab settling. It is crucial for long-term stability.
3. Set Up Formwork
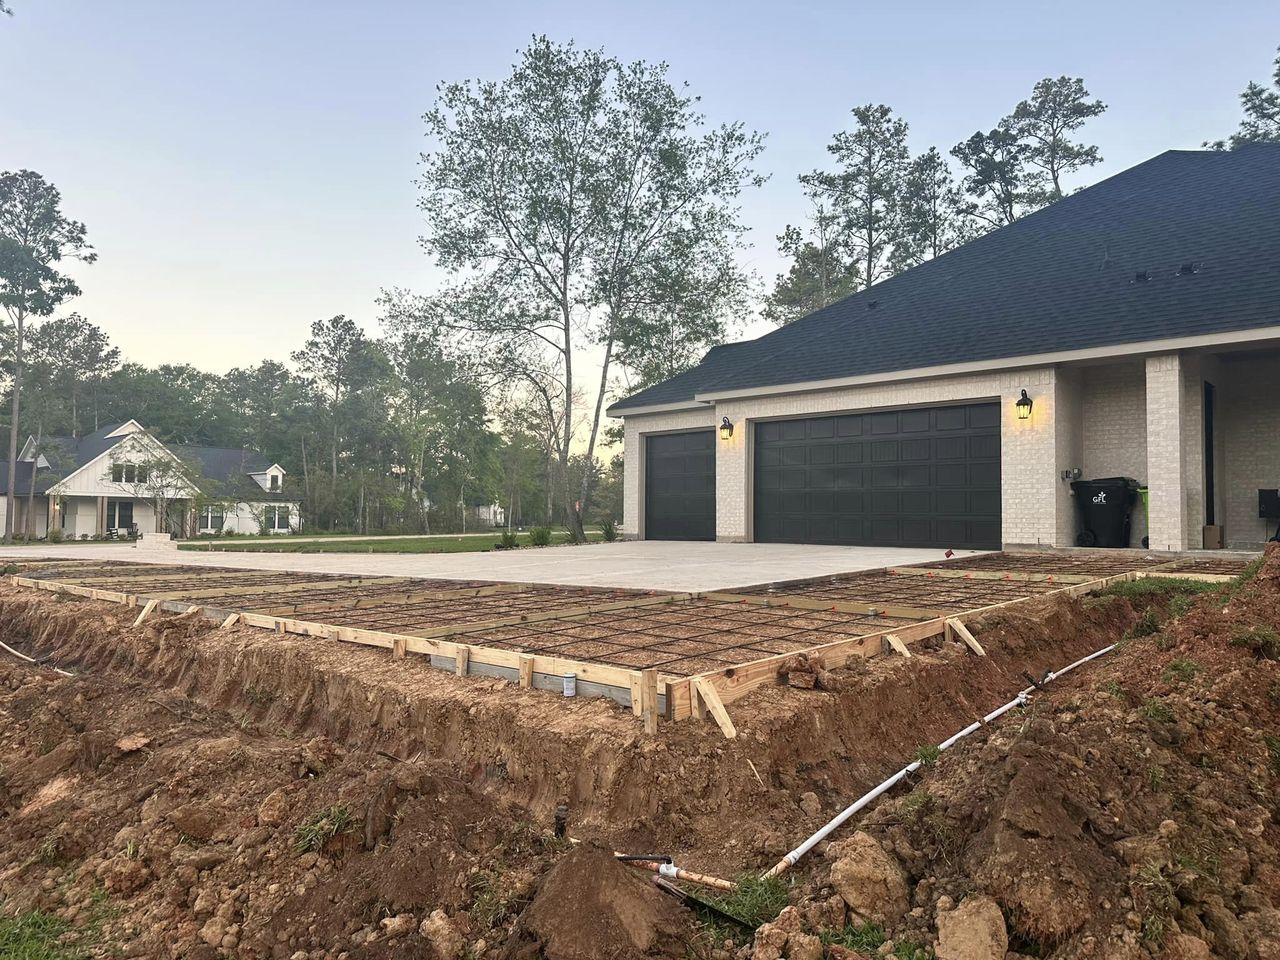
The formwork defines the exact perimeter and thickness of your 10x10 slab. Use 2x4s, 2x6s, or similar lumber, depending on your chosen slab thickness. The top edge of the forms will be the final height of your concrete.
Lay out the boards along the marked perimeter. Secure them firmly with stakes driven into the ground. Ensure the forms are perfectly square. Measure diagonally from corner to corner to check for squareness.
Level the forms precisely. Use a long level or a laser level to ensure the top edges are even. If you've planned a slope for drainage, ensure the forms reflect this gradual incline. Secure all connections tightly.
4. Install Vapor Barrier (Optional but Recommended)
A vapor barrier is a heavy-duty plastic sheeting (usually 6-mil thick). It is placed directly on top of the compacted sub-base. This layer prevents moisture from rising through the slab.
It helps reduce efflorescence (white mineral deposits) and moisture-related issues. Lay the sheeting, overlapping seams by 6-12 inches. Tape the seams. This creates a continuous moisture barrier.
For a 10x10 slab, this step adds minimal cost. It provides significant long-term benefits. It protects the slab from ground moisture.
5. Place Reinforcement
Reinforcement adds tensile strength to the concrete. It helps control cracking caused by expansion, contraction, and settling. For a 10x10 slab, wire mesh or rebar are common.
If using wire mesh, lay it across the entire slab area. Overlap sections by at least one grid square. Use rebar chairs or plastic dobies to lift the mesh. It should be positioned in the middle or upper-third of the concrete.
If using rebar, lay out a grid pattern (e.g., 18-inch squares). Tie intersections with rebar wire. Use chairs to elevate the rebar off the sub-base. Proper placement ensures reinforcement is effective.
6. Mixing and Pouring the Concrete
If using bags, mix concrete in batches according to package directions. Add water gradually until a workable consistency is achieved. Avoid adding too much water, as this weakens the concrete.
For larger projects, consider ordering ready-mix concrete. This is delivered by truck. It ensures consistent quality. Ready-mix saves considerable labor compared to mixing bags.
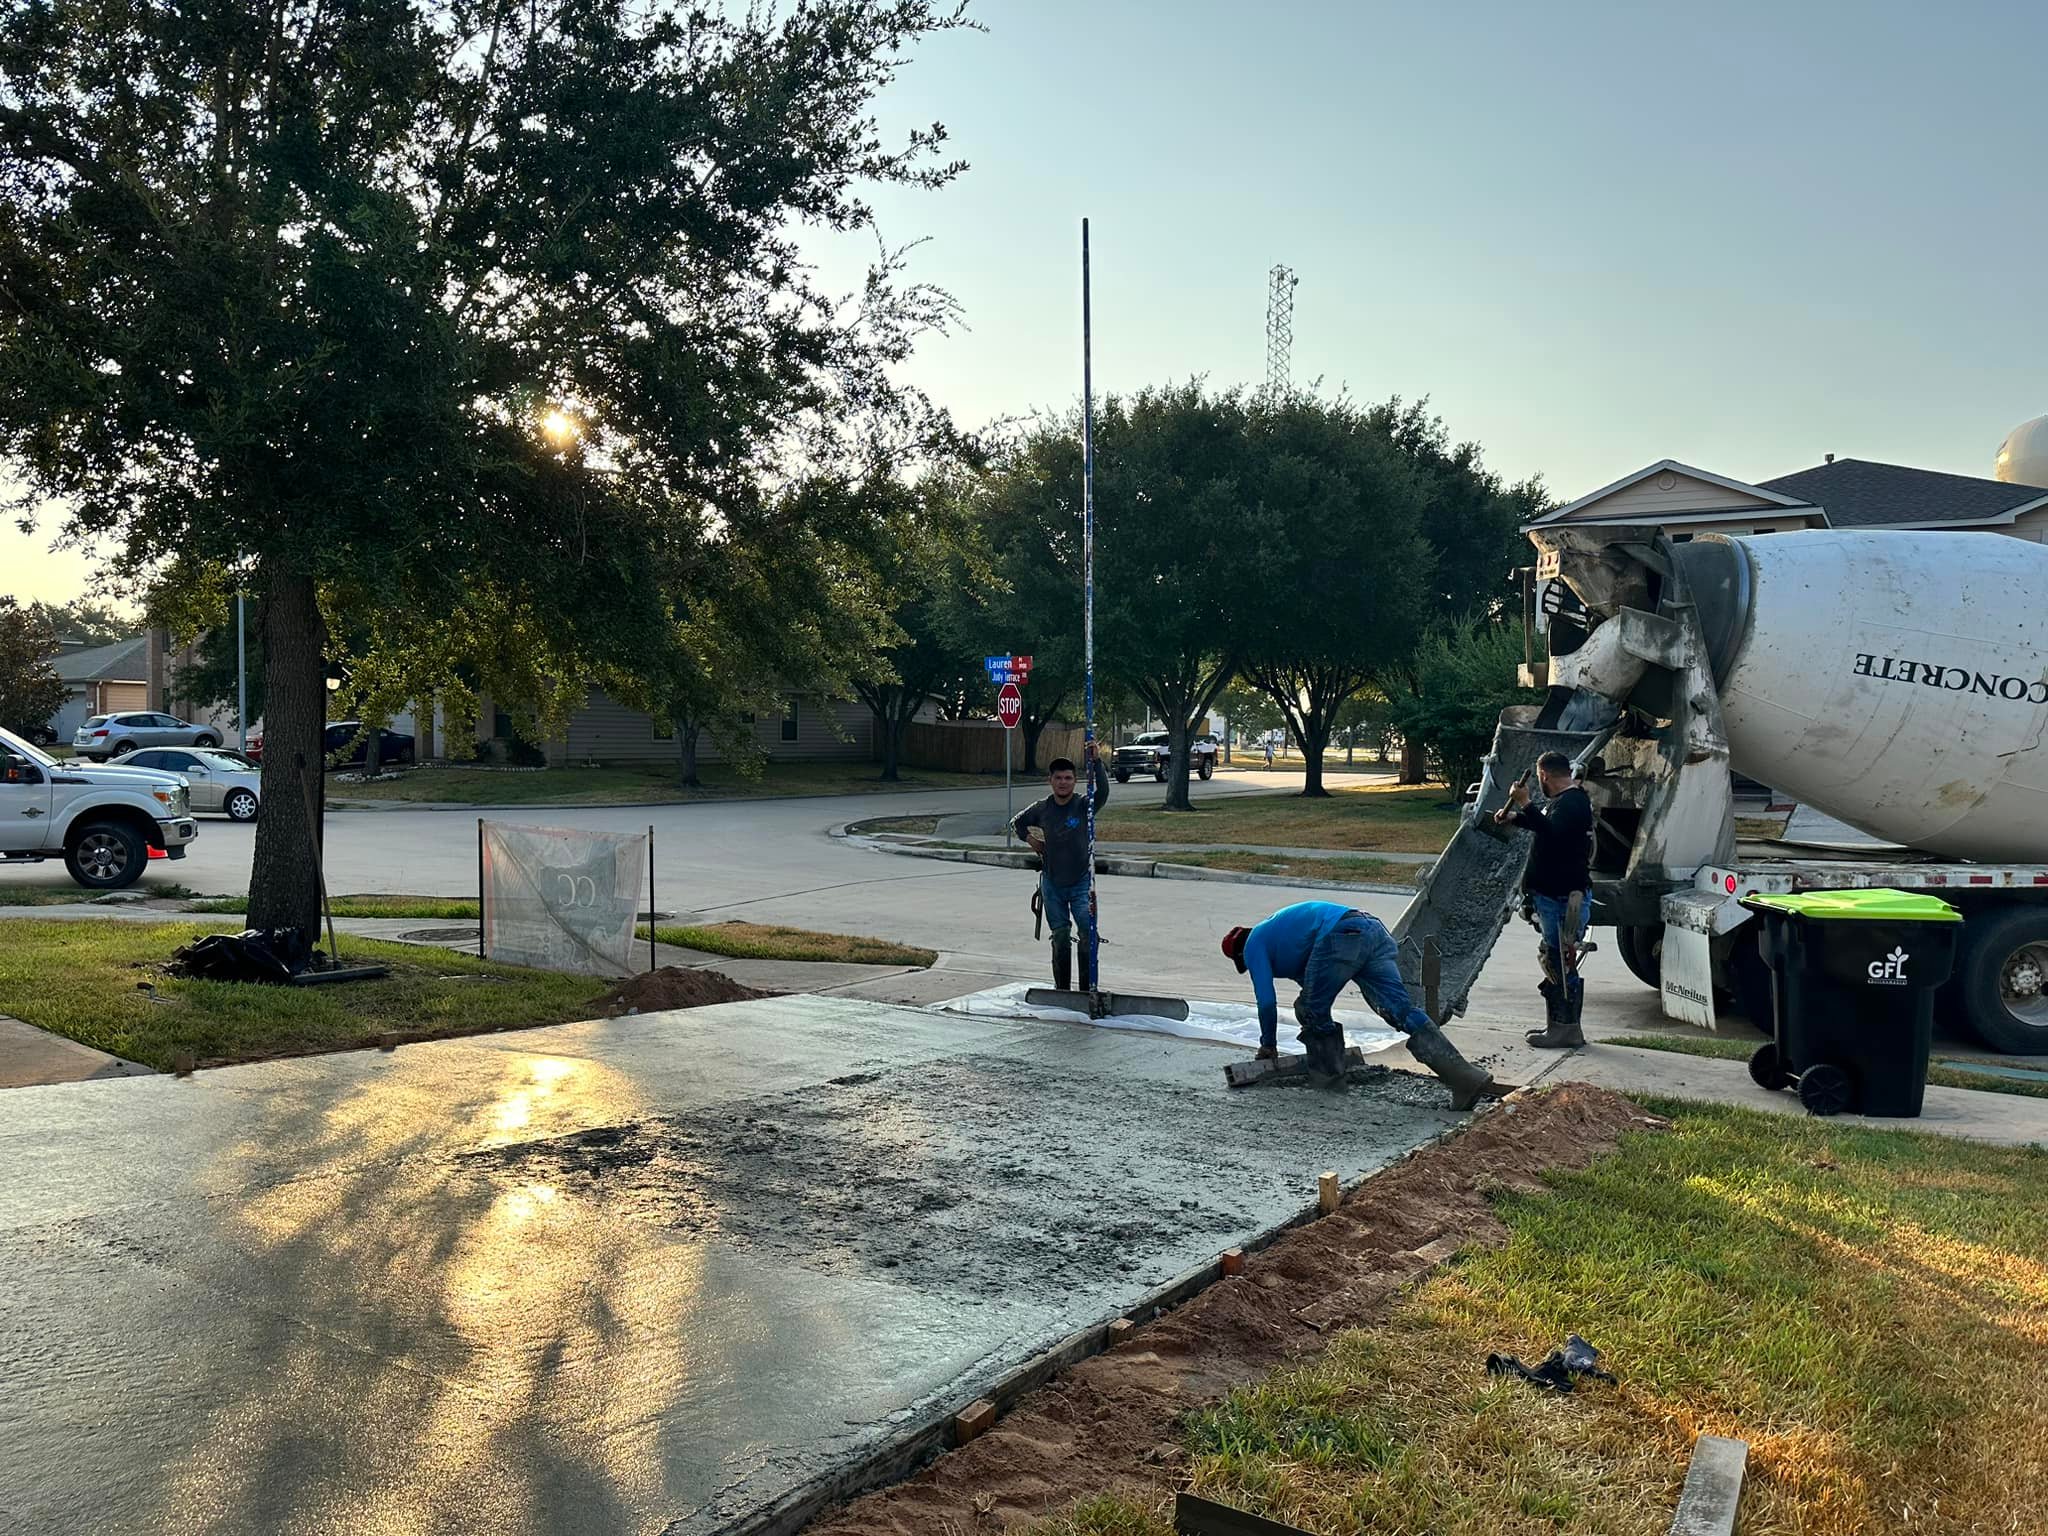
Begin pouring the concrete directly into the forms. Start at one end and work your way across. Use shovels or rakes to spread the concrete evenly. Fill the forms completely.
Work quickly, especially in warm weather. Concrete begins to set relatively fast. Ensure the entire area is filled before the concrete hardens.
7. Spreading and Screeding
Once the forms are filled, use a screed board to level the concrete. A screed is a long, straight piece of lumber or metal. Rest it on the top edges of the forms.
Pull the screed board across the wet concrete in a sawing motion. This levels the concrete. It removes excess material. Repeat until the surface is uniform and flush with the forms.
This step creates the basic flat surface. It ensures consistent slab thickness. Proper screeding is fundamental for a level finished product.
8. Floating the Surface
After screeding, wait for the concrete to lose its initial wet sheen. This is typically when surface water has evaporated. This stage is called "bleeding."
Use a bull float (for larger areas) or a hand float (for smaller ones). Push and pull the float across the concrete surface. This smooths out any marks left by screeding. It also brings the cement paste ("cream") to the top.
Floating compacts the surface slightly. It helps to prepare it for subsequent finishing steps. Do not over-float, as this can trap water.
9. Edging and Grooving (Control Joints)
As the concrete begins to set further, use an edger tool along the perimeter. This creates a rounded, durable edge. It prevents chipping and spalling.
Control joints (or "grooves") are essential for concrete slabs. They are intentionally cut lines that weaken the slab at specific points. This directs where cracks will occur. Concrete naturally cracks due to expansion and contraction.
For a 10x10 slab, a control joint running down the middle in both directions is typical. This effectively creates four 5x5 foot sections. Use a groover tool to make these cuts. The depth should be at least one-quarter of the slab's thickness.
10. Final Finishing
The final finishing technique depends on your desired surface.
Broom Finish: Use a concrete broom to create a non-slip texture. Pull the broom evenly across the surface. This is common for outdoor patios or sections of a concrete driveway where slip resistance is important.
Trowel Finish: For a smooth, dense surface, use a steel hand trowel or power trowel. This requires skilled timing. Troweling compacts the surface and makes it very durable. It is often used for garage floors or indoor slabs.
Ensure the concrete has sufficiently stiffened before final finishing. Working too early can damage the surface. Working too late makes it difficult to achieve the desired texture.
11. Curing the Concrete
Curing is arguably the most critical step for concrete strength and durability. It involves maintaining proper moisture and temperature conditions. This allows the concrete to fully hydrate and gain strength.
Begin curing as soon as the final finish is complete. Methods include:
Applying a liquid curing compound: Sprayed directly onto the surface.
Covering with plastic sheeting: Traps moisture from the concrete.
Keeping it wet with misting or wet burlap: Requires continuous re-wetting.
Cure the concrete for at least 7 days, ideally 28 days for full strength. Proper curing prevents rapid drying, which can cause cracking and reduce strength. It is vital for a long-lasting slab.
12. Sealing the Concrete (Post-Curing)
After the concrete has fully cured (typically after 28 days), applying a sealer is highly recommended. A sealer adds a protective layer to the surface. It guards against moisture penetration, stains, and abrasion.
Sealers come in various types (e.g., acrylic, penetrating). Choose one appropriate for your slab's use and desired look. Sealing enhances appearance. It extends the life of your concrete.
Re-sealing is typically needed every few years, depending on traffic and exposure. This simple maintenance step greatly benefits the slab's longevity.
DIY vs. Professional Contractor
Deciding whether to tackle a 10x10 concrete slab as a DIY project or hire a professional is a crucial choice. Both options have distinct advantages and disadvantages, especially considering the project's scale.
Pros and Cons of DIY
Pros:
Cost Savings: The primary benefit of DIY is saving on labor costs. You pay only for materials and tool rentals. This can significantly reduce the overall expense for a smaller slab.
Personal Satisfaction: Completing a project yourself can be very rewarding. You have full control over every step. It offers a sense of accomplishment.
Learning Experience: DIY provides valuable hands-on experience. You learn about concrete work. This knowledge can be useful for future home projects.
Cons:
Time and Labor Intensive: Even a 10x10 slab involves significant physical labor. Site preparation, mixing, pouring, and finishing are demanding. This can be particularly challenging for beginners.
Tool Rental Costs: You'll need to rent specialized equipment. This includes a plate compactor, concrete mixer, and various finishing tools. These costs can add up.
Risk of Mistakes: Concrete is unforgiving. Errors in mixing, pouring, or finishing can lead to a substandard slab. This includes uneven surfaces, weak spots, or excessive cracking. Fixing mistakes can be costly.
Limited Expertise: Without experience, achieving a professional-quality finish is difficult. Understanding the nuances of concrete setting times is crucial. This expertise comes with practice.
Safety Concerns: Working with concrete and heavy equipment carries risks. Chemical burns from wet concrete are possible. Injuries from lifting or operating machinery can occur.
When to Hire a Professional
While a 10x10 slab is feasible for an experienced DIYer, certain situations warrant hiring a professional.
Lack of Experience or Time: If you have no concrete experience, or limited time, a professional ensures the job is done right. They have the expertise and dedicated crew.
Complex Site Conditions: Sloping terrain, poor drainage, or challenging soil require expert assessment. Professionals can navigate these issues effectively. They have specialized equipment for complex ground work.
Desired High-Quality Finish: For a perfectly smooth, decorative, or highly specialized finish, a professional is essential. Their skill results in a superior aesthetic. This is especially true for visible areas.
Specific Load Requirements: If the slab needs to support heavy loads or act as a foundation (like a section of a concrete driveway), precise engineering and robust installation are critical. Professionals ensure structural integrity.
Peace of Mind and Warranty: A reputable contractor provides a warranty on their work. This offers peace of mind. It ensures recourse if issues arise after installation.
For any concrete project, especially those beyond simple pathways, consulting with local professionals like Cincos Concrete can provide valuable insights. They can help you weigh your options realistically.
Common Mistakes to Avoid in Concrete Slab Projects
Even for a relatively small 10x10 concrete slab, mistakes can be costly. Avoiding these common errors ensures a durable, functional, and attractive result. Vigilance throughout the process is key.
Over-watering the Concrete Mix
Adding too much water to your concrete mix is a critical error. While more water makes the concrete easier to work with, it significantly weakens the final product. It increases porosity and reduces compressive strength.
Excess water leads to a higher water-cement ratio. This results in weaker, more permeable concrete. It increases the likelihood of cracking, dusting, and scaling. Always follow manufacturer's instructions for bagged concrete. For ready-mix, trust the supplier's engineers.
Inadequate Sub-Base Preparation
Skimping on sub-base preparation is a major pitfall. A poorly compacted or uneven sub-base will lead to serious problems. These include differential settling and extensive cracking of the slab.
Ensure the subgrade is firm and uniformly compacted. The gravel sub-base must also be compacted in layers. It needs to be consistently level. This solid foundation prevents future slab failures.
Rushing the Curing Process
Curing is not merely drying. It is a chemical hydration process that develops concrete strength. Rushing or skipping proper curing is a common mistake. It severely compromises the concrete's long-term durability.
Rapid drying leads to premature shrinkage cracking. It reduces the concrete's ultimate strength and abrasion resistance. Always follow recommended curing times (at least 7 days, ideally 28). Use effective curing methods like plastic sheeting or curing compounds.
Insufficient Reinforcement Placement
Incorrect placement of wire mesh or rebar renders it ineffective. If reinforcement sits directly on the sub-base, it provides no structural benefit. It must be elevated within the middle to upper-third of the slab.
Use proper rebar chairs or plastic dobies to support the reinforcement. Ensure it remains in place during the pour. Correctly positioned reinforcement is vital for crack control and structural integrity.
Pouring in Extreme Temperatures
Pouring concrete in very hot or very cold weather can cause significant problems. Extreme heat causes rapid drying and faster setting. This leads to increased cracking and reduced strength.
Extreme cold slows down the hydration process dramatically. It can lead to freezing of the concrete before it gains sufficient strength. This can result in permanent damage. Always check weather forecasts and take appropriate precautions.
Ignoring Proper Drainage
Failing to establish adequate drainage can lead to water pooling on the slab. It can also cause water to accumulate around the slab's edges. This can undermine the sub-base over time.
Ensure a slight slope is incorporated into your slab design. This directs water away from the area. Proper drainage protects the slab. It prevents erosion of the surrounding landscape.
Avoiding these common mistakes ensures your 10x10 concrete slab is built to last. It optimizes your investment. It minimizes the need for future repairs.
Safety Precautions When Working with Concrete
Working with concrete involves inherent risks. Taking proper safety precautions is essential. This protects yourself and anyone assisting with the project. Safety should always be the top priority.
Personal Protective Equipment (PPE)
Always wear appropriate personal protective equipment. This includes:
Safety Glasses or Goggles: Protect your eyes from splashes of wet concrete, dust, and debris.
Work Gloves: Heavy-duty, chemical-resistant gloves protect your hands from the abrasive and caustic nature of wet concrete.
Long Sleeves and Pants: Cover exposed skin to prevent concrete burns. Wear old clothes that can be discarded.
Waterproof Boots: Steel-toed, waterproof boots protect your feet from heavy objects and wet concrete. Wet concrete can cause severe chemical burns if it penetrates clothing to the skin.
Chemical Burns from Wet Concrete
Wet concrete is highly alkaline and can cause severe chemical burns. Prolonged skin contact can lead to first-, second-, or even third-degree burns. These burns can be very painful and require medical attention.
If wet concrete gets on your skin, wash it off immediately with plenty of clean water. Do not rub the affected area. Seek medical attention if irritation persists or burns develop.
Lifting and Ergonomics
Concrete bags are heavy. An 80-pound bag weighs 80 pounds. Lift with your legs, not your back, to prevent injury. Use a partner or a hand truck for moving multiple bags.
Be mindful of your posture when shoveling, raking, or floating. Take frequent breaks. Avoid overexertion. Proper ergonomics minimize strain and fatigue during the strenuous work.
Power Tool Safety
If using power tools like a concrete mixer, plate compactor, or power trowel, follow all manufacturer instructions. Ensure cords are in good condition and grounded. Wear hearing protection when operating noisy machinery.
Keep bystanders, especially children and pets, away from the work area. Never operate machinery while under the influence of alcohol or drugs. Prioritize a clear and safe working environment.
First Aid Preparedness
Have a well-stocked first aid kit readily available. Know how to administer basic first aid for cuts, scrapes, and burns. In case of serious injury, know how to contact emergency services immediately.
Working safely ensures your concrete project is a success. It protects you and your team. Never compromise on safety when handling concrete.
Local Regulations and Permits
Ignoring local building codes and permit requirements can lead to serious headaches. Even for a 10x10 concrete slab, adherence is essential. Regulations are in place for safety, structural integrity, and community planning.
Why Permits Are Necessary
Permits ensure your project complies with local standards. They verify the proposed construction is safe and structurally sound. They also confirm it adheres to zoning laws.
For example, a concrete driveway installation, even a small section, often requires a permit. This is because it impacts public right-of-way or storm drainage. Even a shed slab might require one.
Permits protect you and your property. Without a permit, you could face fines. You might be forced to tear out the work. This can be significantly more expensive than the permit itself.

How to Check Local Requirements
Start by contacting your local city or county building department. Their website usually has information on permits. You can also call or visit their office.
Explain your project in detail. Specify the size (10x10 feet), thickness, and intended use. Ask about required drawings, inspections, and fees. This initial inquiry is crucial.
Be aware that requirements can vary even within the same state. What's needed in Yorba Linda, California, might differ from Humble, Texas. Local jurisdiction dictates the rules.
Impact on Project Timeline and Cost
Obtaining permits adds time to your project timeline. It involves application processing and inspections. Factor this into your schedule. Don't plan to pour concrete tomorrow if you need a permit today.
Permit fees are an additional cost. While usually not exorbitant for a small slab, they are part of the budget. Failing to get a permit can result in stop-work orders or higher penalties.
If you hire a professional contractor, they should handle the permitting process. This is a key service they provide. It alleviates this burden from the homeowner.
Why Accurate Concrete Calculation Matters
Precise calculation of concrete bags isn't just about getting the project done. It directly impacts your budget, efficiency, and the overall success of your 10x10 slab. Small errors can lead to big problems.
Cost Savings and Efficiency
Over-ordering concrete means paying for material you don't use. While a few extra bags are fine, significantly more can be a waste. Unused bags must be stored or disposed of properly.
Under-ordering is far worse. Running short during a pour is a critical situation. Concrete sets quickly. Halting work for more material means cold joints, uneven surfaces, and compromised strength. This leads to costly delays and potential rework.
Accurate calculation ensures you buy just enough, optimizing your material budget. It streamlines the mixing and pouring process. You avoid frantic trips to the store or costly short-load delivery fees.
Avoiding Project Delays
A shortage of concrete brings the entire project to a grinding halt. Time is critical when working with wet concrete. Any interruption during the pour can affect the slab's integrity.
Ordering more bags or another ready-mix delivery takes time. This break can result in visible seams (cold joints) on your slab. It impacts structural uniformity. Planning ahead prevents these interruptions.
Minimizing Material Waste
Calculating correctly means less leftover material. This reduces waste. It's more environmentally friendly. You won't have to worry about storing or disposing of excess concrete.
Proper planning helps prevent over-mixing bags that aren't used. It avoids ordering too much ready-mix. This thoughtful approach saves resources and reduces cleanup.
For any concrete project, from a small shed base to a section of a concrete driveway, accurate estimation is foundational. It's a key part of smart project management.
Get Expert Concrete Advice in Humble, Texas
Planning a concrete slab project, even a 10x10 one, involves numerous details. From calculating bags to ensuring proper curing, each step contributes to the final result. For homeowners in Humble, Texas, expert guidance can make all the difference.
Cincos Concrete has been a trusted concrete contractor in the Humble area for over a decade. They bring extensive knowledge and experience to every project. Their team understands local soil conditions and building codes. They can ensure your slab is built to last.
Whether you're looking to pour a simple backyard patio, a sturdy shed foundation, or even tackle part of a concrete driveway, Cincos Concrete offers comprehensive solutions. They provide precise estimates. They also deliver high-quality craftsmanship.
Don't leave your concrete project to chance. For a precise calculation, professional advice, and expert installation, reach out to the local specialists. Cincos Concrete is committed to delivering durable, functional, and aesthetically pleasing concrete work for your property.
Contact Cincos Concrete today for a FREE consultation and personalized estimate:
Phone: 281-800-5096
Website: https://cincosconcretecontractorhumbletx.com/concrete-driveways
Conclusion
Determining the number of concrete bags for a 10x10 slab involves a straightforward calculation. Start by converting all dimensions to feet to find the cubic footage. Then convert to cubic yards. Factor in a 5-10% waste margin. Finally, divide by the yield per bag (e.g., 0.60 cubic feet for an 80lb bag) to get your total.
Beyond the numbers, successful concrete work relies on meticulous planning and execution. Proper site preparation, accurate formwork, effective reinforcement, and diligent curing are all vital. Choosing between DIY and professional help depends on your experience, tools, and desired outcome.
Always prioritize safety and adhere to local building codes. Accurate calculation saves money and prevents project delays. With careful planning and perhaps expert assistance, your 10x10 concrete slab will be a durable and valuable addition to your property.
